Introduction:
In this lab, we dove into a program known as Measure Ground Control. This program is an all inclusive application that allows for extensive mission planning for all members of an organization. This limits having to have multiple different applications for flight, mission planning, and data collection. Measure Ground Control has everything in the same location making it easy and efficient to use for UAS flight operations. In this lab, I will be going through the some of the features of MGC as well as how it can be used for UAS operations.
Objectives:
#1: Discover, identify, and apply the basic concepts behind Measure Ground Control
#2: Demonstrate proficiency and knowledge on how to best utilize measure desktop and the measure mobile app in mission planning and flights
#3: Relate how an end-to-end SSOT solution such as measure can streamline UAS operations, integrate UAS into the airspace, and contribute to the digital transformation through critical thought discussions
Method/Assignment:
Measure is an intelligence company that designs and builds applications to help streamline drone operations workflow. Ground Control was created to do just this and has helped many companies save hours of work and millions of dollars by making operations more efficient. For this lab, I will be using an iPad to go through some of the functionalities that Measure Ground Control has as well as the web tool that goes along side it.
Upon opening the application and signing in the user is met with 4 circles labeled Airspace Map, Settings, Fly, Flight Plans. (Figure.1) This is the main screen and it is where you will be accessing the majority of the functions.
 |
| (Figure.1 Home Screen MGC) |
The Airspace Map opens up a map that allows the user to visually see their location or search a desired location. This function shows the coordinates, location, weather, and, most importantly, airspace restrictions. (Figure.2) In the bottom right corner of Figure.1, notice the red triangle with the exclamation mark. This is where airspace restrictions and advisories can be seen. By clicking on the symbol the user can see what the current restrictions are for that airspace. For Purdue, there is currently a flight restriction for the football games that are upcoming. This window also shows what airports are nearby and if there is a controlled airspace. (Figure.3)
 |
| (Figure.2 Airspace Map Screen) |
 |
| (Figure.3 Rules & Advisories) |
On the Airspace Map the user can also click on the weather symbol next to the flight restrictions and pull up a more detailed view of the areas current and future weather. This window displays information such as temperature, wind, precipitation, dew point, pressure, and visibility. (Figure.4)
 |
| (Figure.4 Weather) |
The legend (Figure.5) shows the various symbols that identify different airspaces. According figure 5, I am currently in the vicinity of an airport, designated by the dark yellow circle.
 |
| (Figure.5 Legend) |
Another important feature on this window is the Request Flight Authorization button. Many operations with UAS will require that the pilot gets prior authorization to fly in that zone. This button makes it easy for the user to access that. (Figure.6)
 |
| (Figure.6 Flight Authorization Menu) |
Back to the main screen, we are now going to look at the settings portion of the application. This menu allows the user to adjust general settings, camera and imagery settings, mapping settings, and even for calibration. Below are images of some of the different settings in each section to give you a better understanding of what can be adjusted here. (Figure.7 & 8)
 |
| (Figure.7 General Settings) |
 |
| (Figure.8 Camera and Imagery Settings) |
The next menu is the Fly functionality portion of Measure Ground Control. This is the function that will be used during actual flying operations. I do not have a drone hooked up to the application but the options are the same regardless there will just be no video feed coming through. (Figure.9)
 |
| (Figure.9) |
There is a lot of information on this screen so I found diagram on Measure's website that shows what each symbol and section of this screen is. (Figure.10)
 |
| (Figure.10 Measure's Diagram of Flight Control Settings) |
 |
| (Figure.11 Flight Modes Menu) |
The other menu that I wanted to show is the 3 bars on the right hand side of the screen. This button opens up the camera settings. These settings can be changed from the above mentioned Settings section but this button allows the user to adjust the camera settings during flight. This eliminates the need for the pilot to take eyes off the drone or the video feed for too long.
 |
| (Figure.12 Camera Settings Menu) |
 |
| (Figure.13 Flight Plans Menu) |
The Grid flight plan is immensely helpful for operations such as inspecting crops in a field. This flight plan gives the user customizability of the grid that they want to use. For example, see the images down below. In figure 14 I found a location for the operation. This is the default grid that they give you once you are finished naming your flight plan. After some adjustments I was able to make the grid almost exactly the same shape as the field itself. (Figure.14 & 15)
 |
| (Figure.14 Default Grid) |
 |
| (Figure.15 Adjusted Grid |
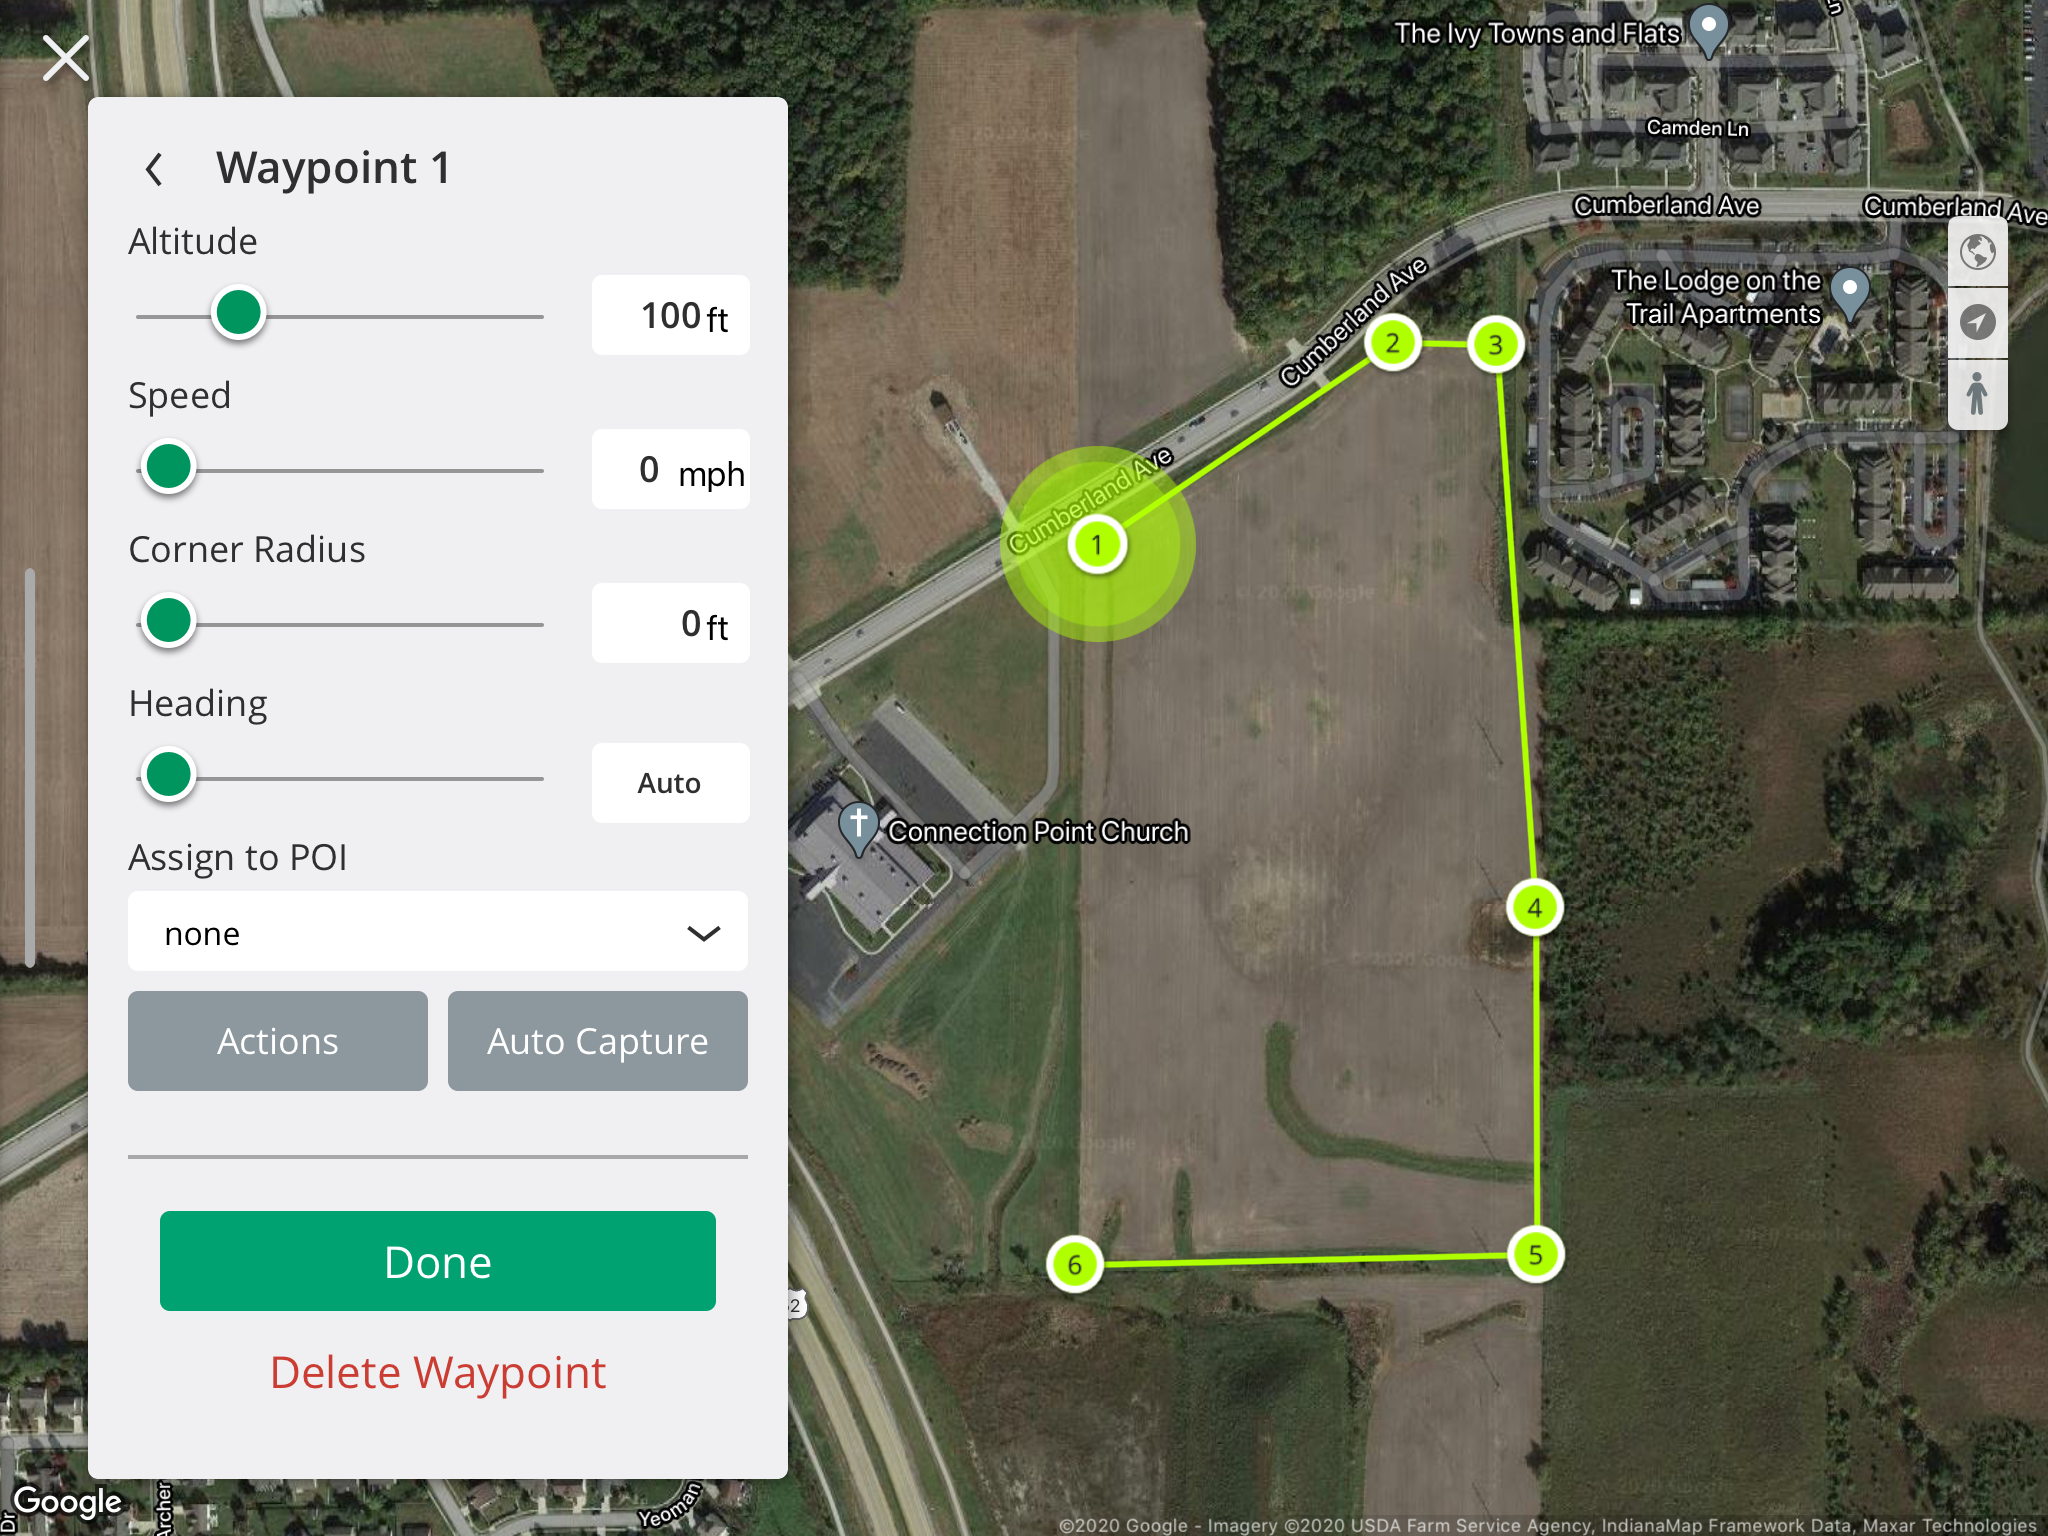 |
| (Figure.16 Waypoint Flight Plan) |
 |
| (Figure.17 Web Portal Dashboard) |
The Web Portal, as mentioned before, has some of the same functions that the application does. For example, users can plan a flight with the grid mode just like they can in the application on the iPad. (Figure.18) These flight plans can also be viewed on the application as well. Multiple users can be added to the group to ensure that everyone on the team has access to the operation plan.
 |
| (Figure.18 Flight Planning on the Web Portal) |
Discussion:
Comments
Post a Comment